目前博客项目代码是放在GitHub上的,每次发布了新了文章会往GitHub上推送一次,还会往托管博客的服务器推送一次,很繁琐
偶然看到可以使用微软的Azure DevOps来创建CI/CD自动构建部署到服务器,这样以来每次在本地发布新的文章,直接push到GitHub就可以摸鱼,等待几分钟后线上博客已经自动更新,美滋滋。
第一次使用Azure Devops,磕磕碰碰的测试了很久,文档目前还没有中文的,全靠谷歌翻译,有些地方自己也不是太明白,但好歹现在感觉弄好了😂
关于CI/CD的文章网上一大堆,专业术语也很多,看的费神就不做多说了😂😂😂
关于Azure DevOps相关文档可以查看https://docs.microsoft.com/en-us/azure/devops/pipelines/?view=azure-devops
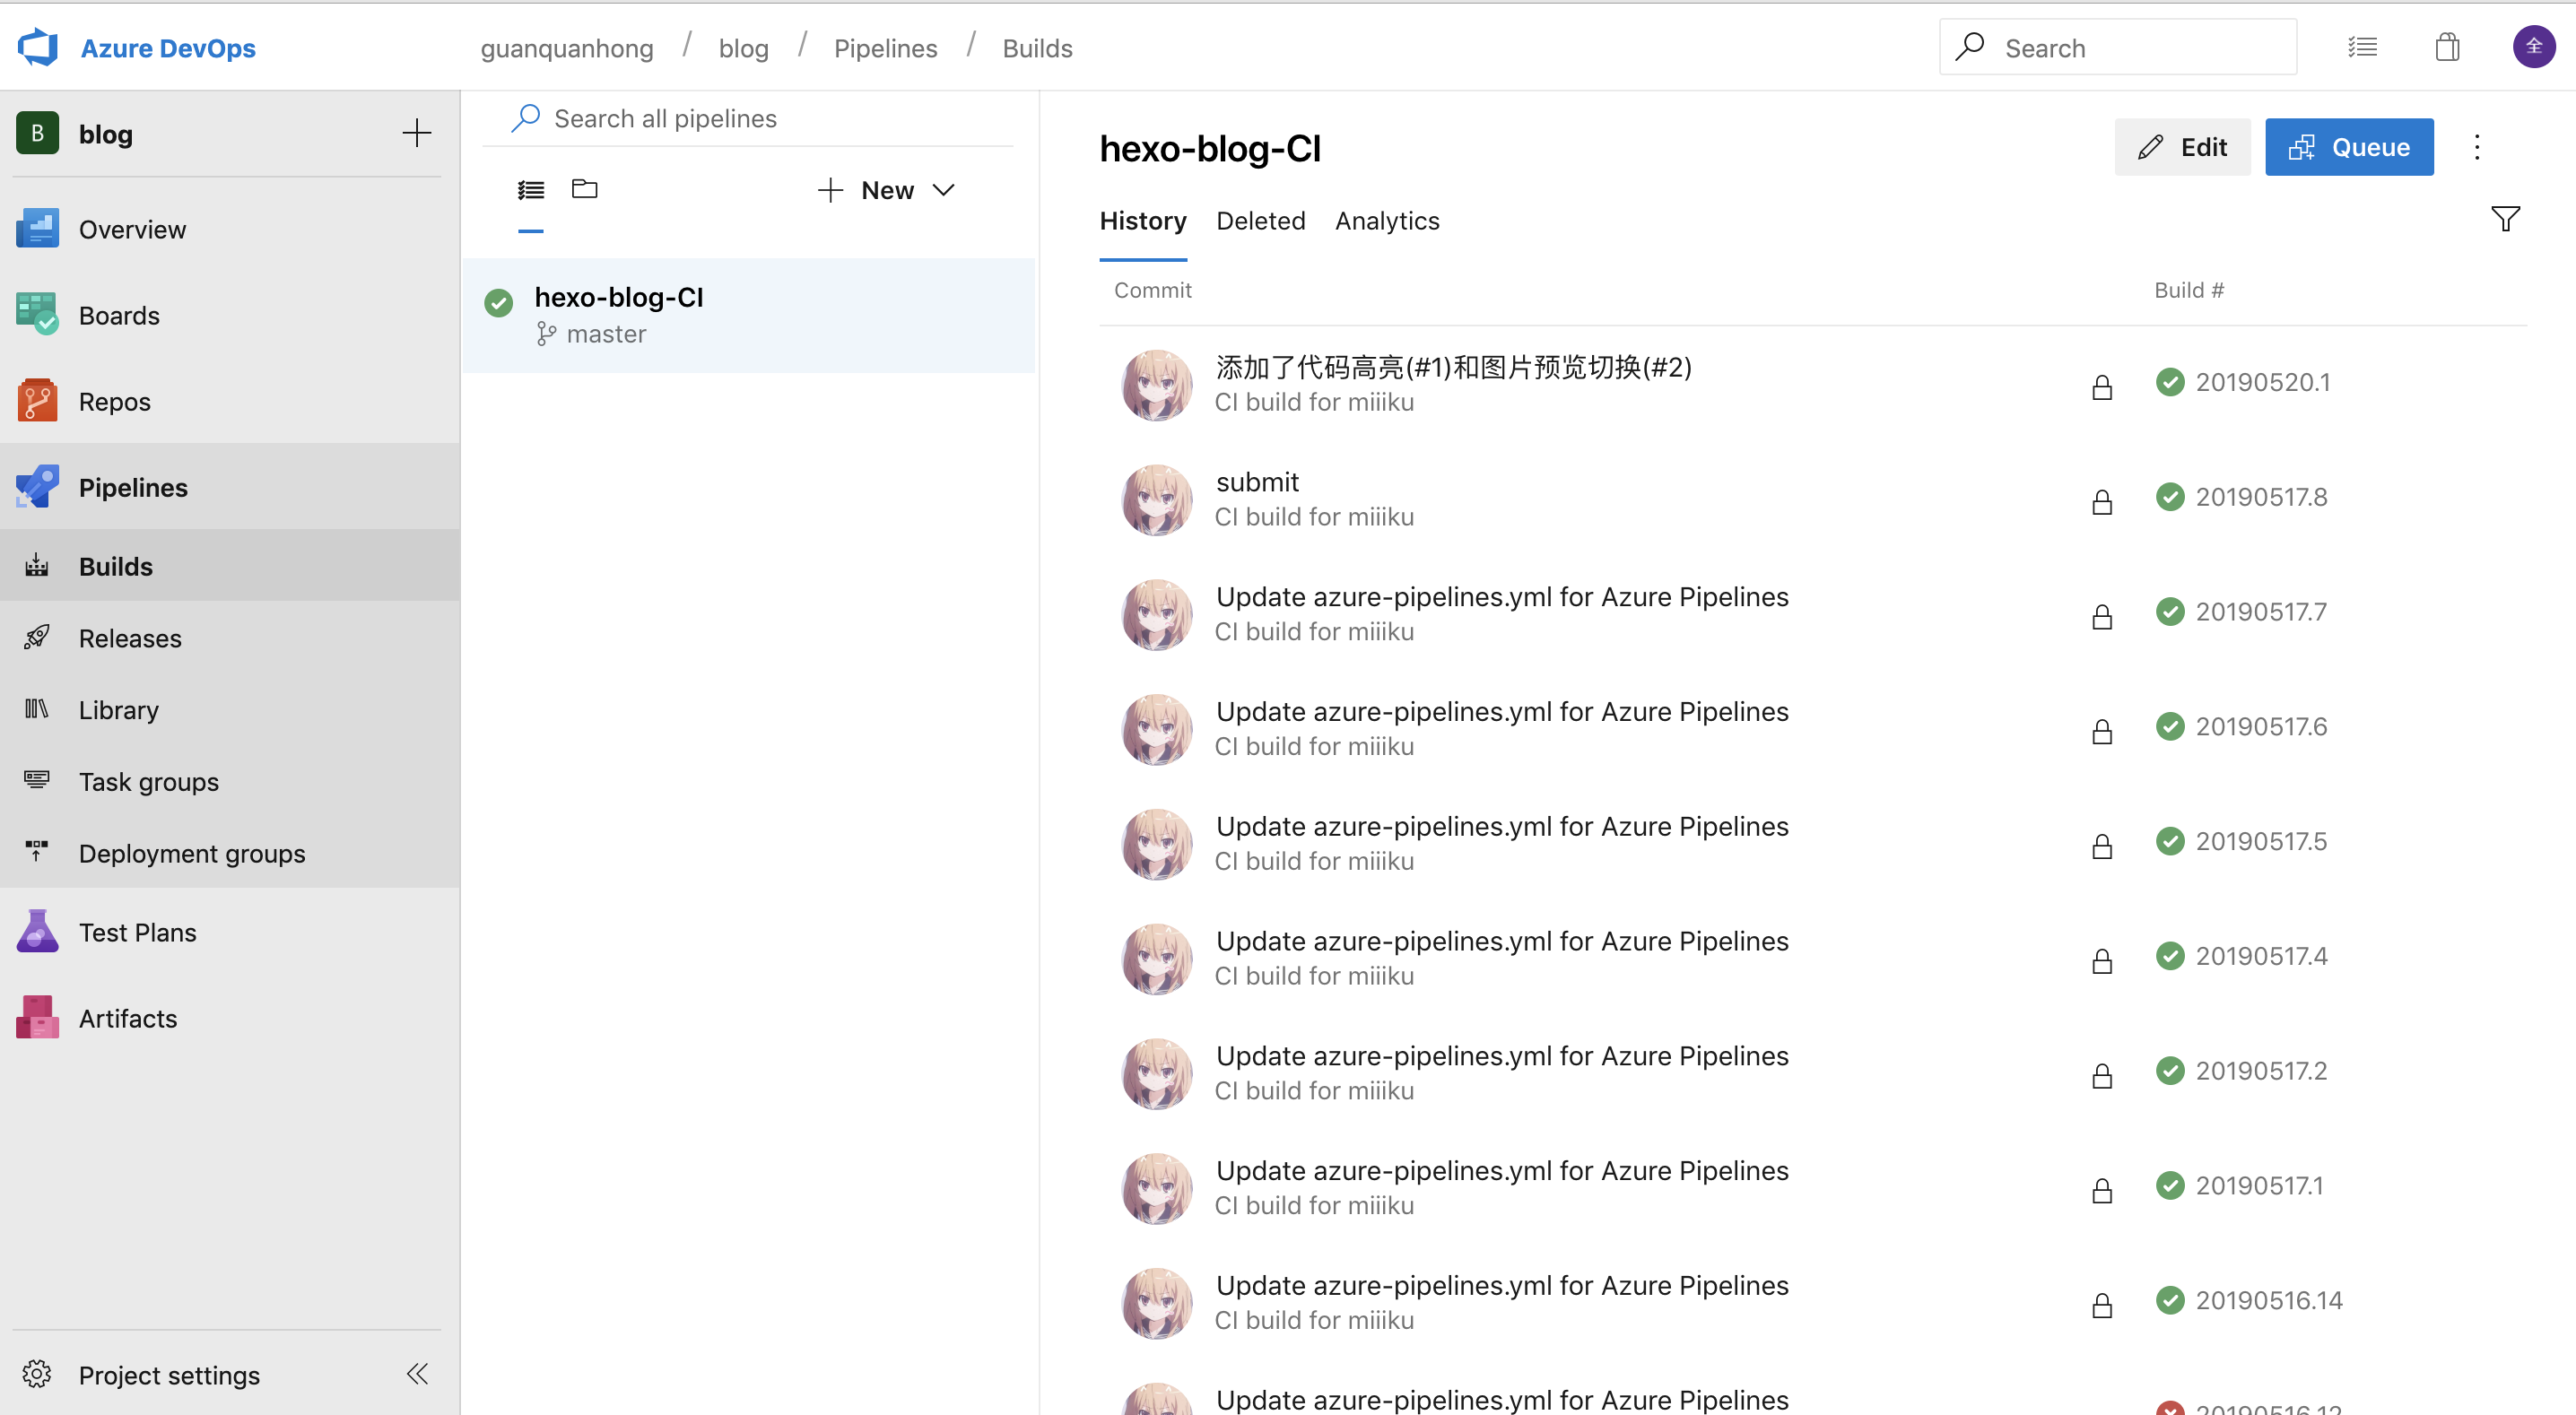
创建CI
在Pipelines 中新建一个Builds 管道任务
我的配置如下
1 2 3 4 5 6 7 8 9 10 11 12 13 14 15 16 17 18 19 20 21 22 23 24 25 26 27 28 29 30 31 32 33 34 35 36 37 38 39 40 41 42 43 44 45 46 47 48 49 50 51 52 53 54 55 56 57 58 59 60 61 62 63 64 65 66 67 68 69 70 trigger: - master pool: vmImage: 'Ubuntu-latest' steps: - task: UseNode@1 inputs: checkLatest: true displayName: 'Install Node.js' - task: Npm@1 inputs: command: 'install' displayName: 'npm install' - task: Npm@1 inputs: command: 'custom' customCommand: 'install hexo -g' displayName: 'npm install hexo -g' - task: Bash@3 inputs: targetType: 'inline' script: 'hexo g' displayName: 'hexo g' - task: ArchiveFiles@2 inputs: rootFolderOrFile: '$(System.DefaultWorkingDirectory)/public' includeRootFolder: false archiveType: 'zip' archiveFile: '$(Build.ArtifactStagingDirectory)/file.zip' replaceExistingArchive: true displayName: 'zip file' - task: PublishBuildArtifacts@1 inputs: PathtoPublish: '$(Build.ArtifactStagingDirectory)/file.zip' ArtifactName: 'blog' publishLocation: 'Container' - script: echo success displayName: 'end...'
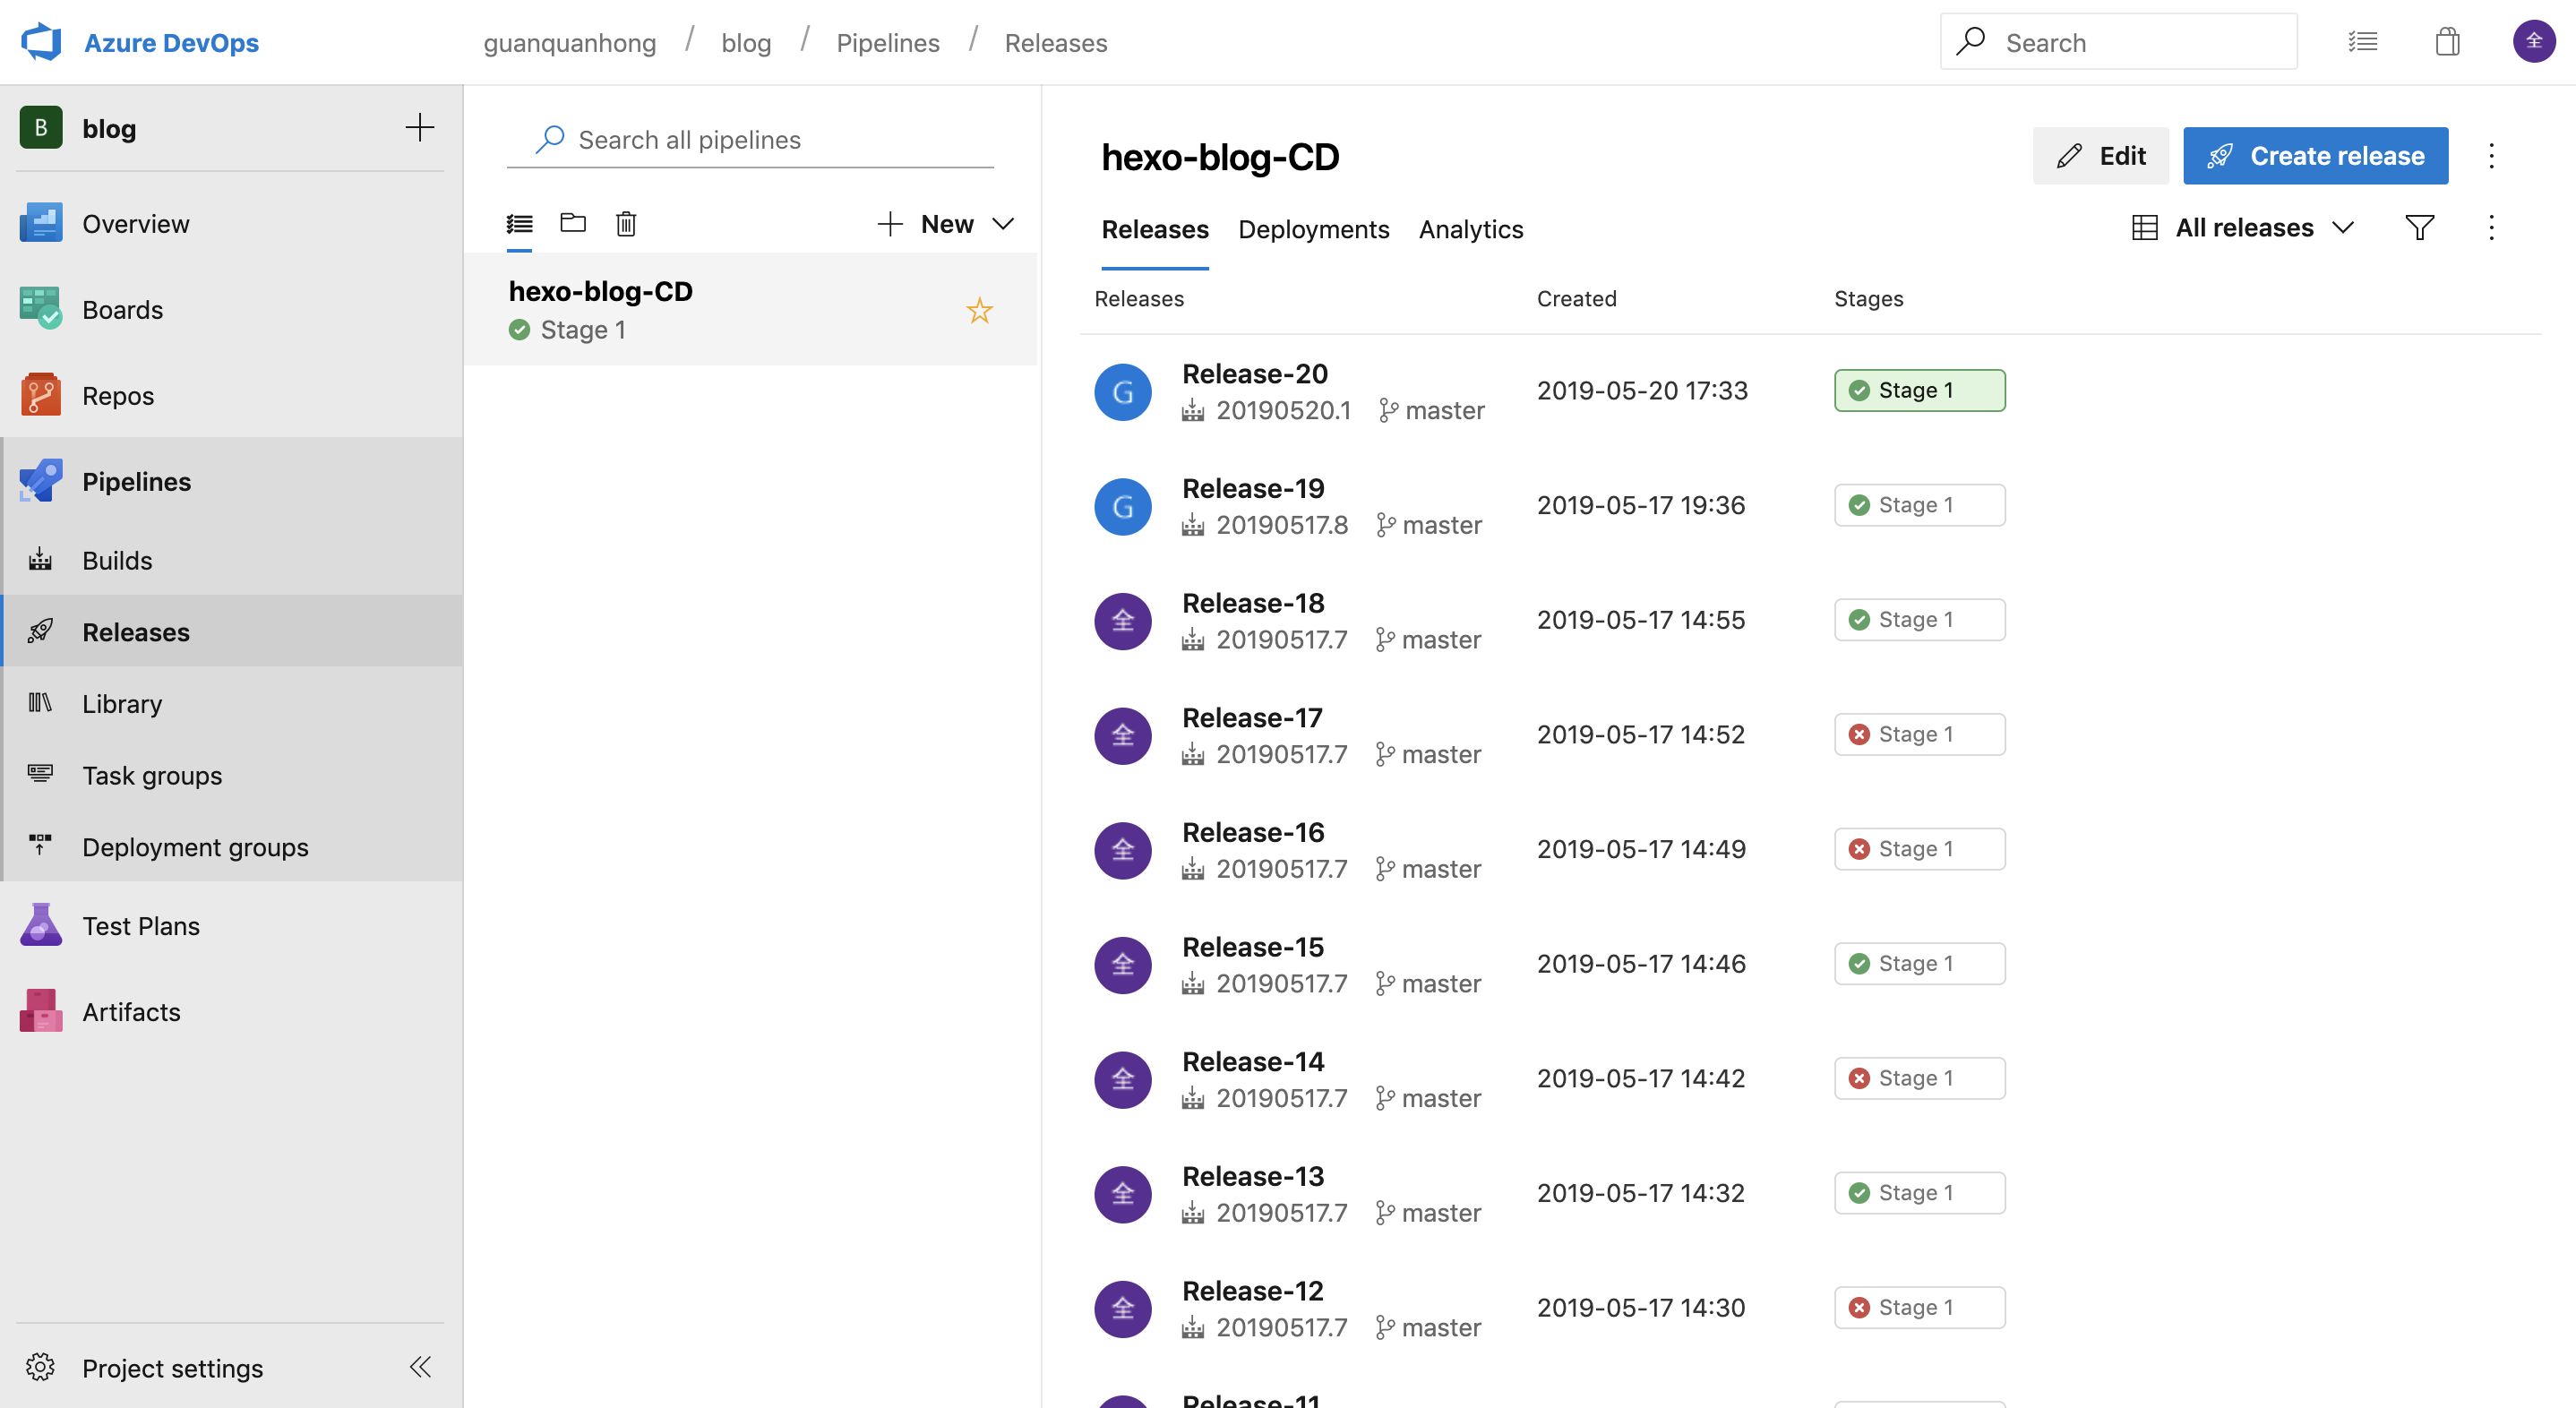
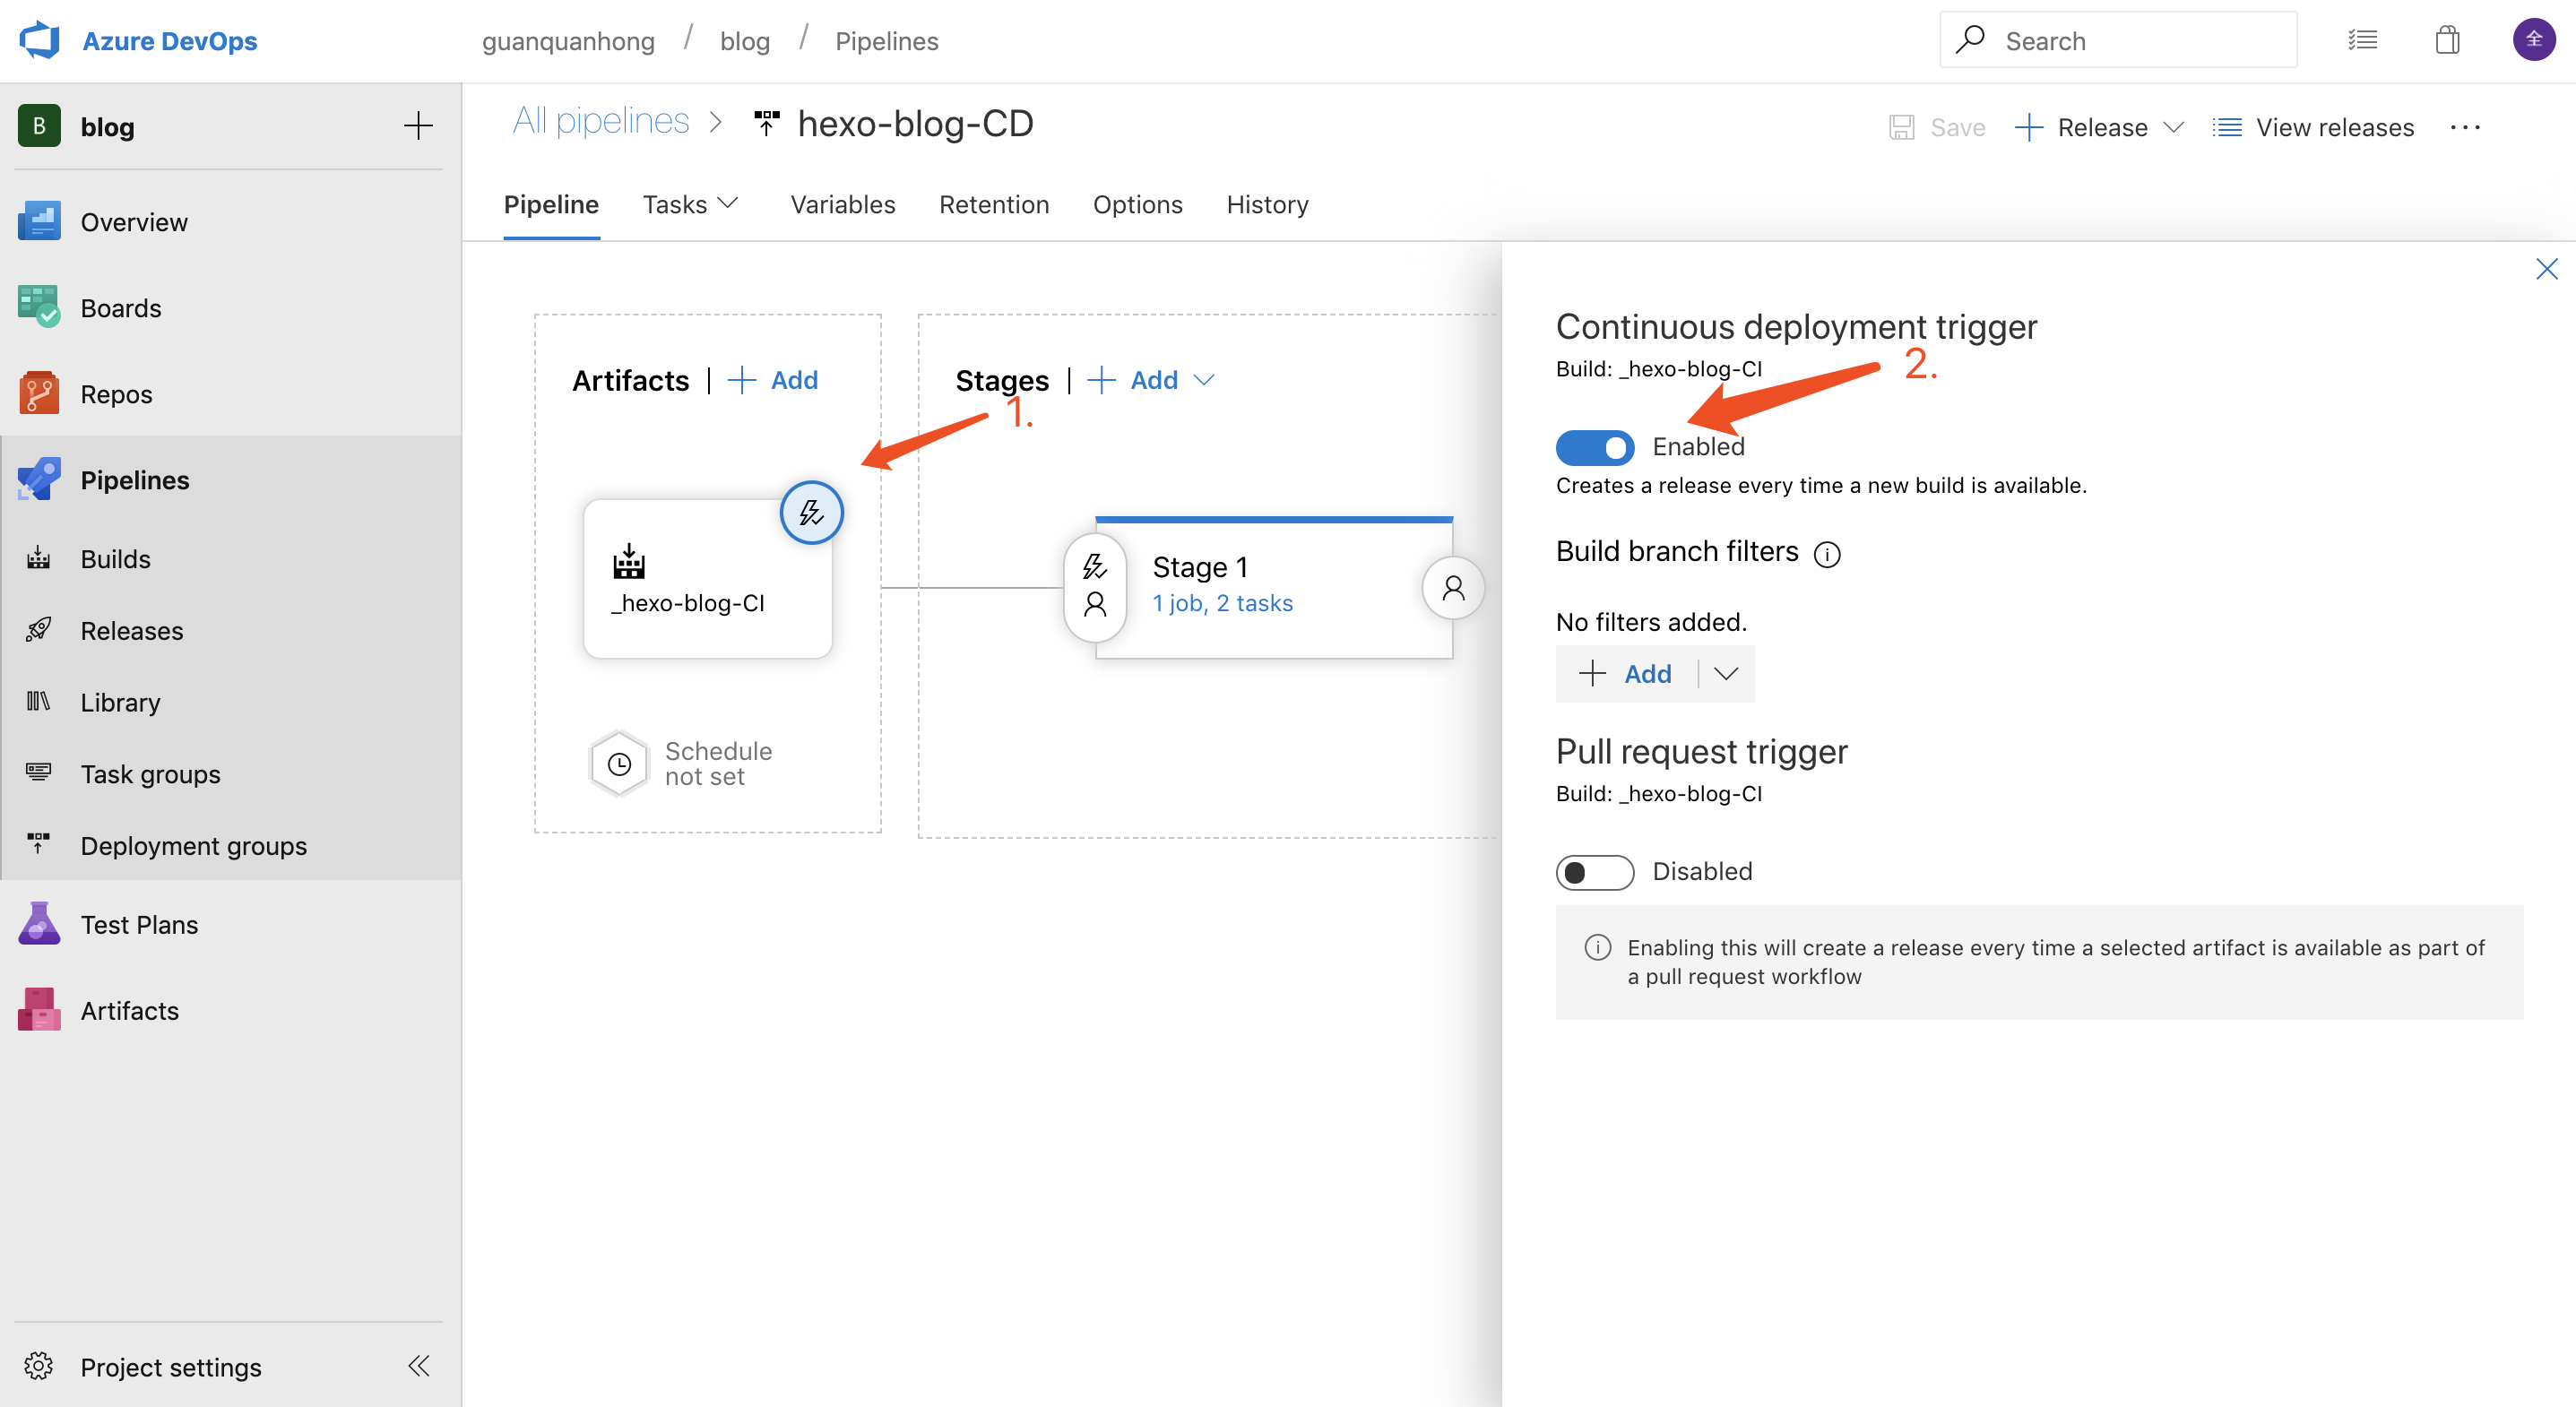
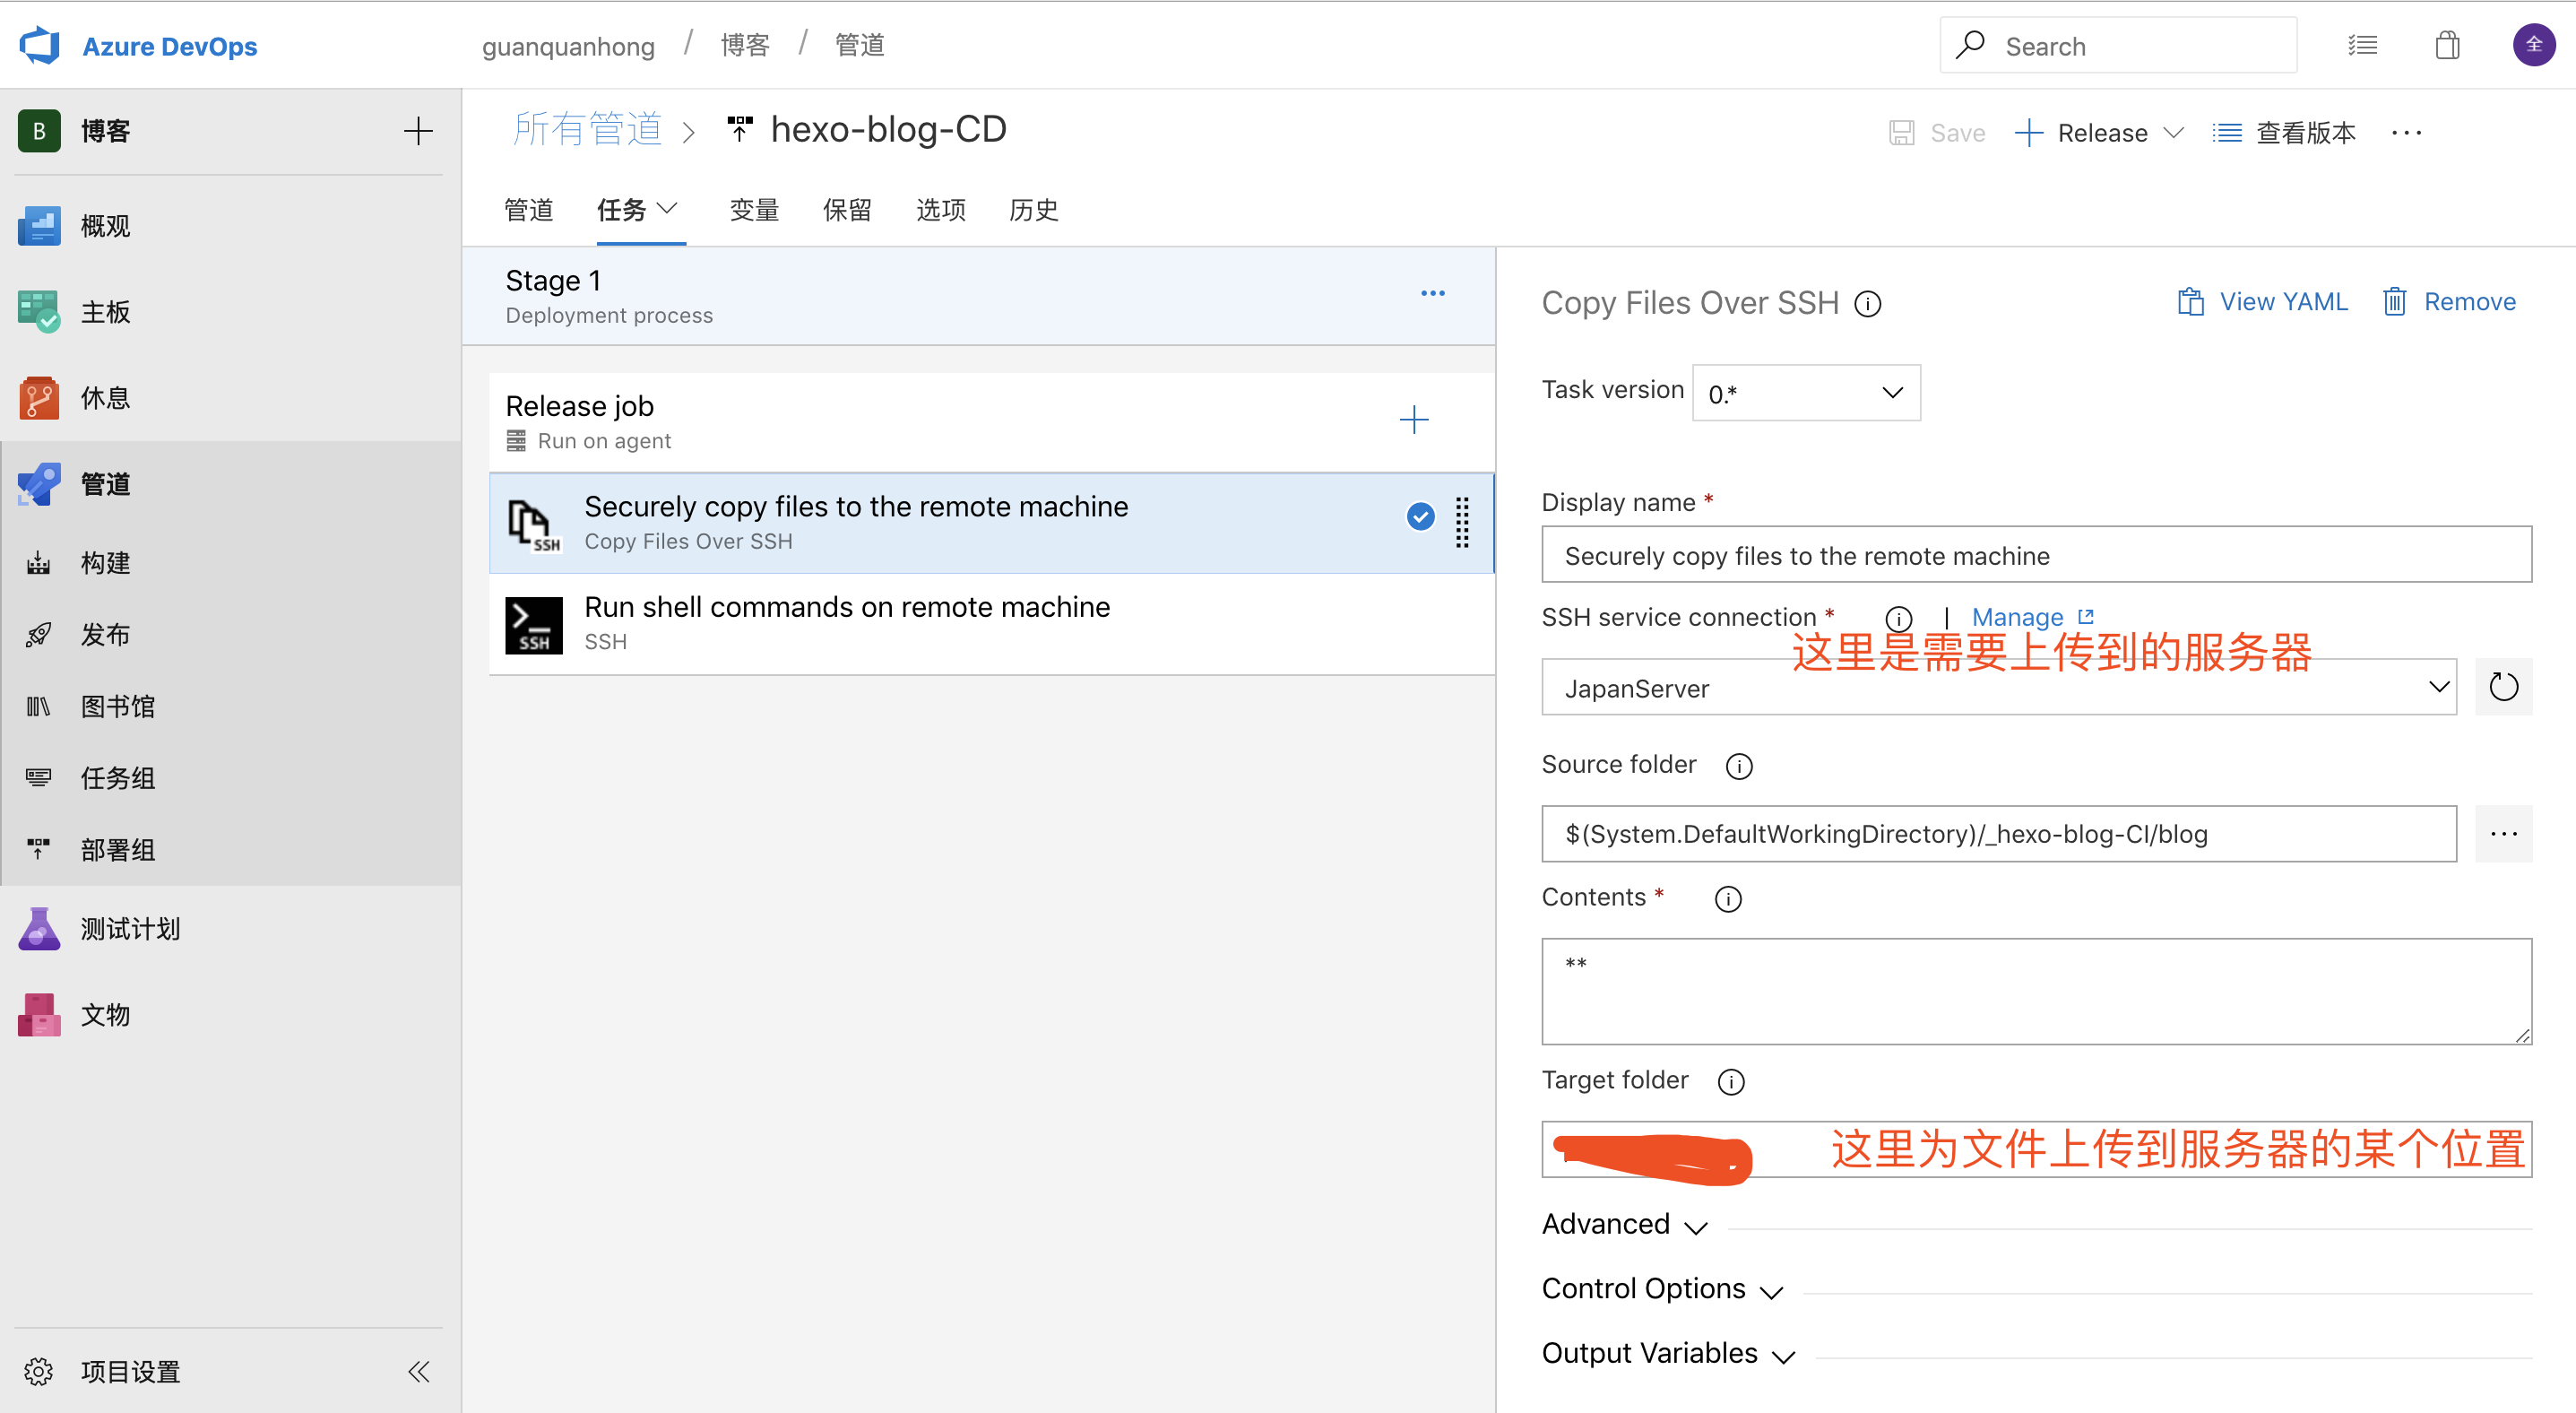
创建CD
这里需要设置触发方式,每次新构建成功后自动触发CD部署代码
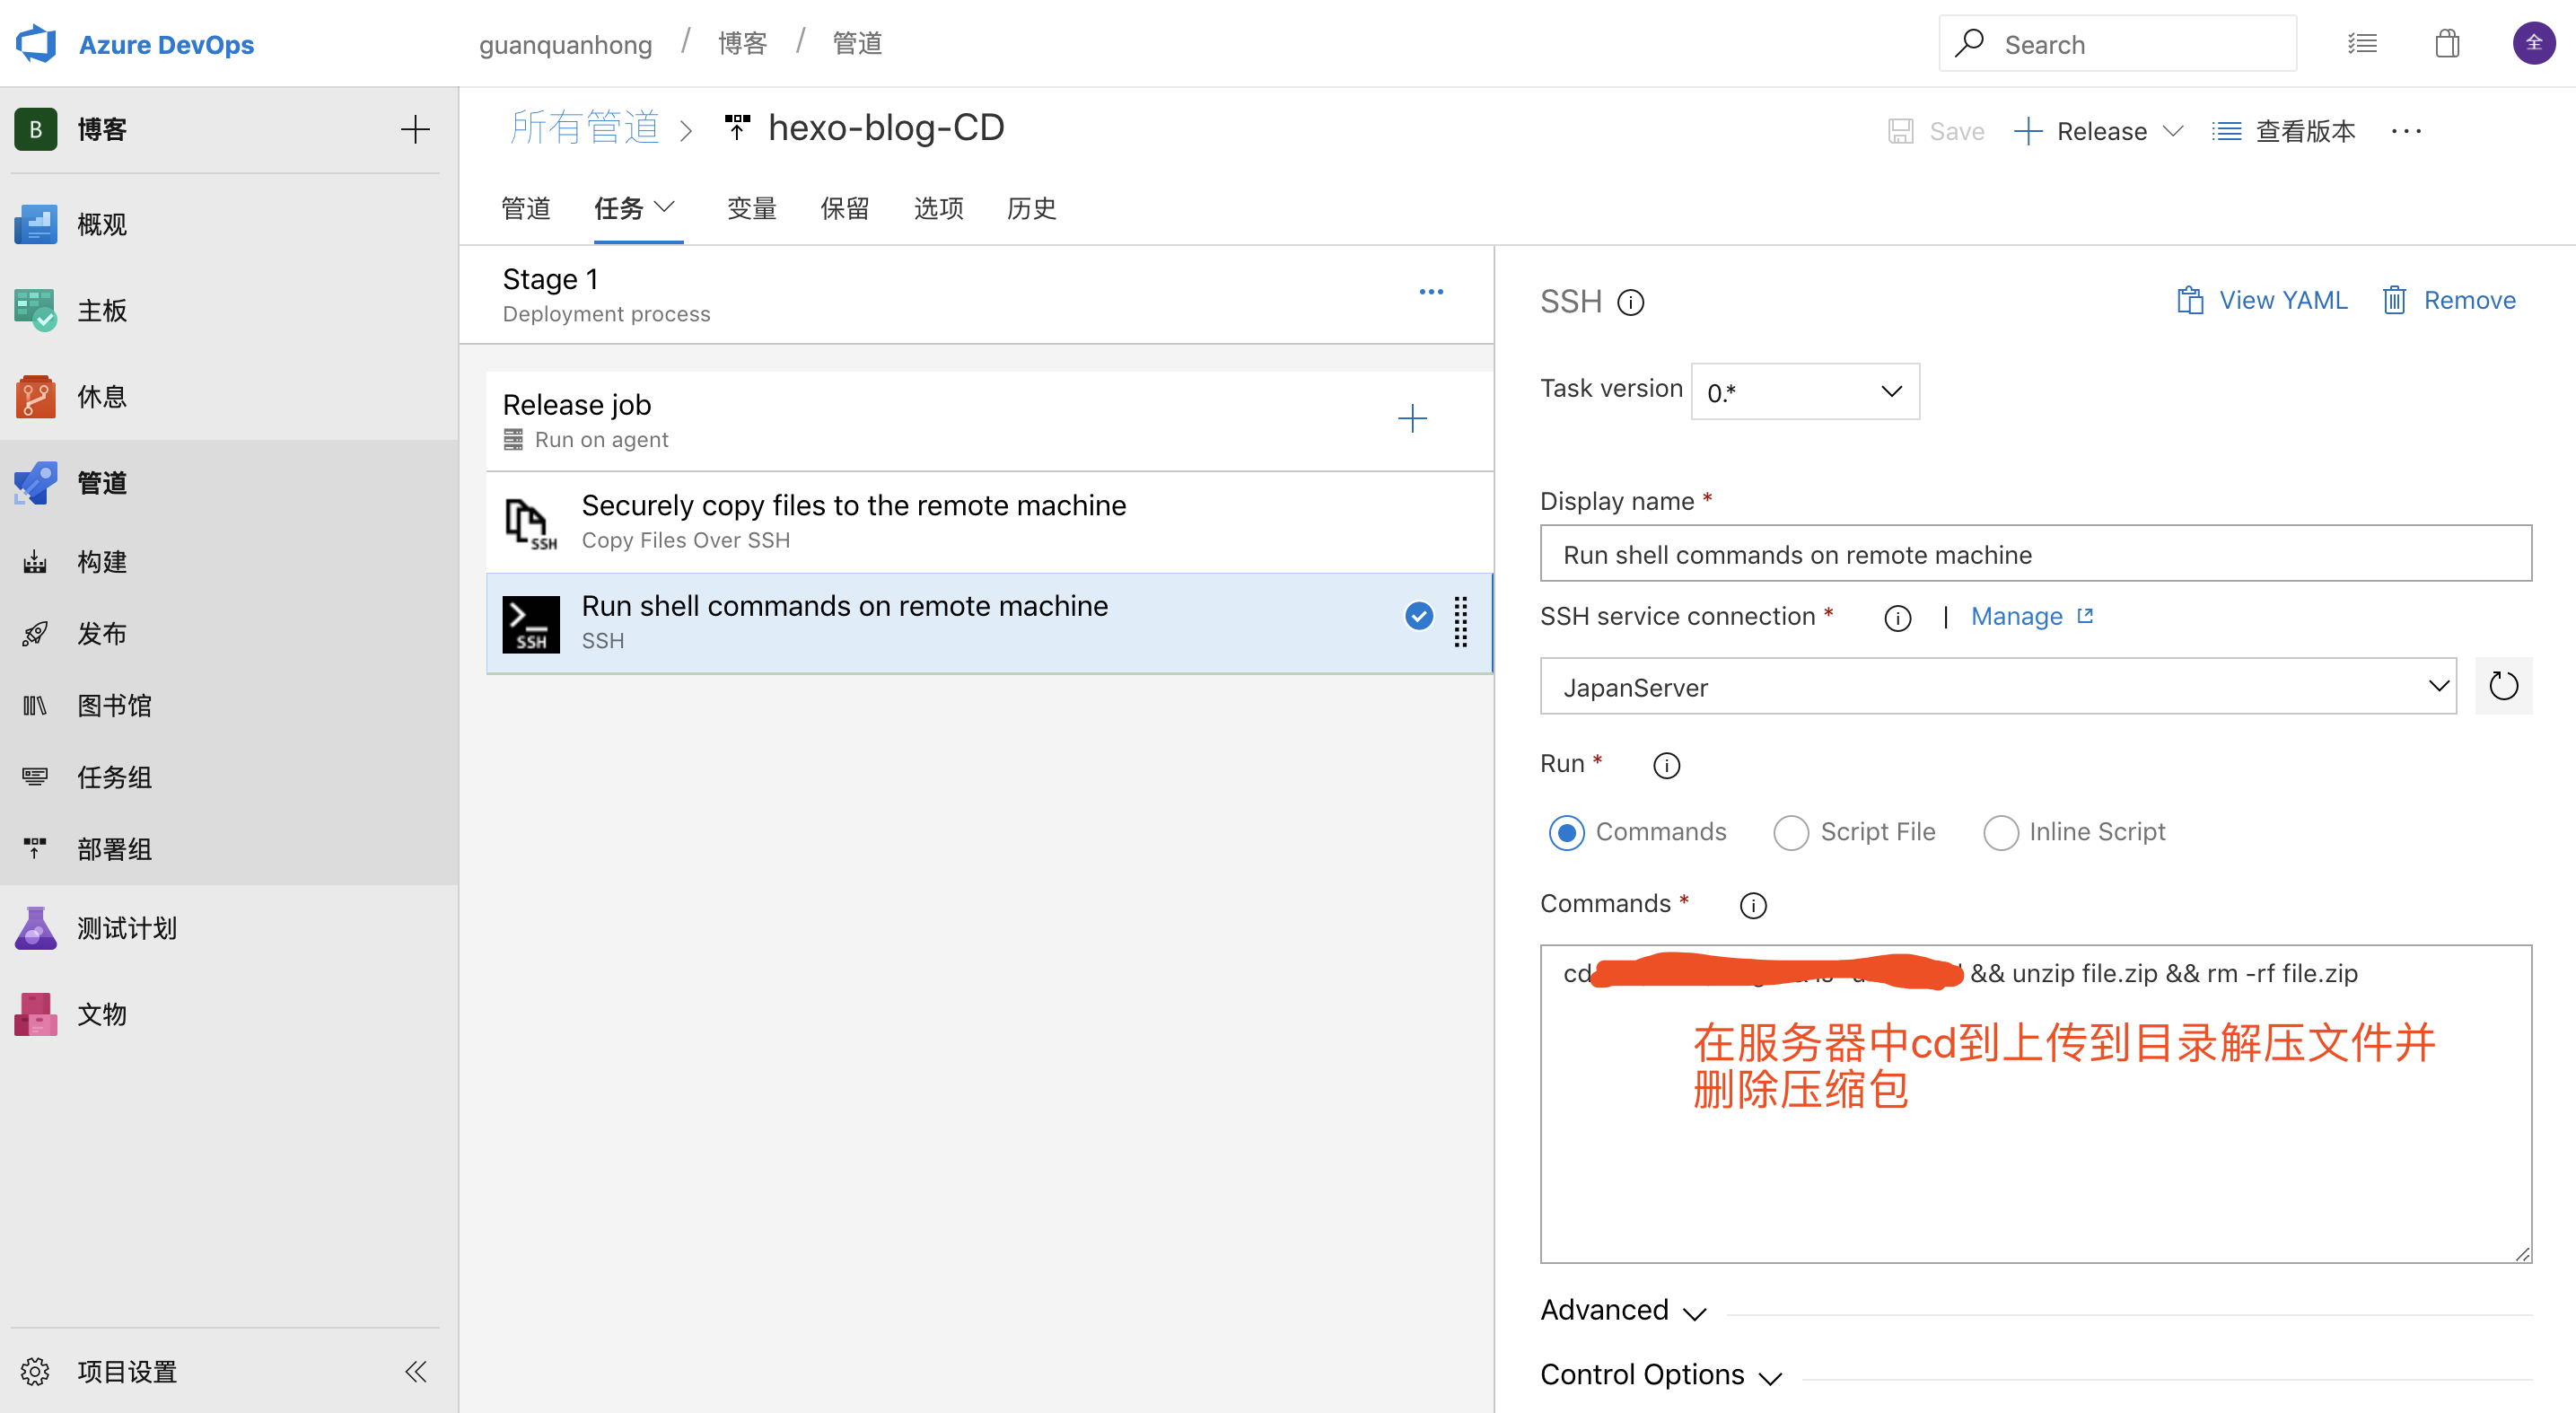
在CD中,我创建了两个任务,第一个是吧CI中打包的文件上传到自己的服务器,第二个则是吧已经上传的压缩包解压出来并删除压缩包,这样就实现了线上博客的更新。
整个大概流程就是这样了,写的并不清楚,一些地方没有说到,主要是嫌弃麻烦😂,嘛,反正只是一次记录,不要在意太多细节。。。。